 "Akio Ohtori - RIP Oppo" (akioohtori)
03/19/2018 at 12:49 • Filed to: Disco Inferno
 5
5
 4
4|
"Akio Ohtori - RIP Oppo" (akioohtori)
03/19/2018 at 12:49 • Filed to: Disco Inferno | 5
| 4 |
I was a man with a mission this weekend and nothing was going to stop me from finishing this damn project. Nothing... except me.
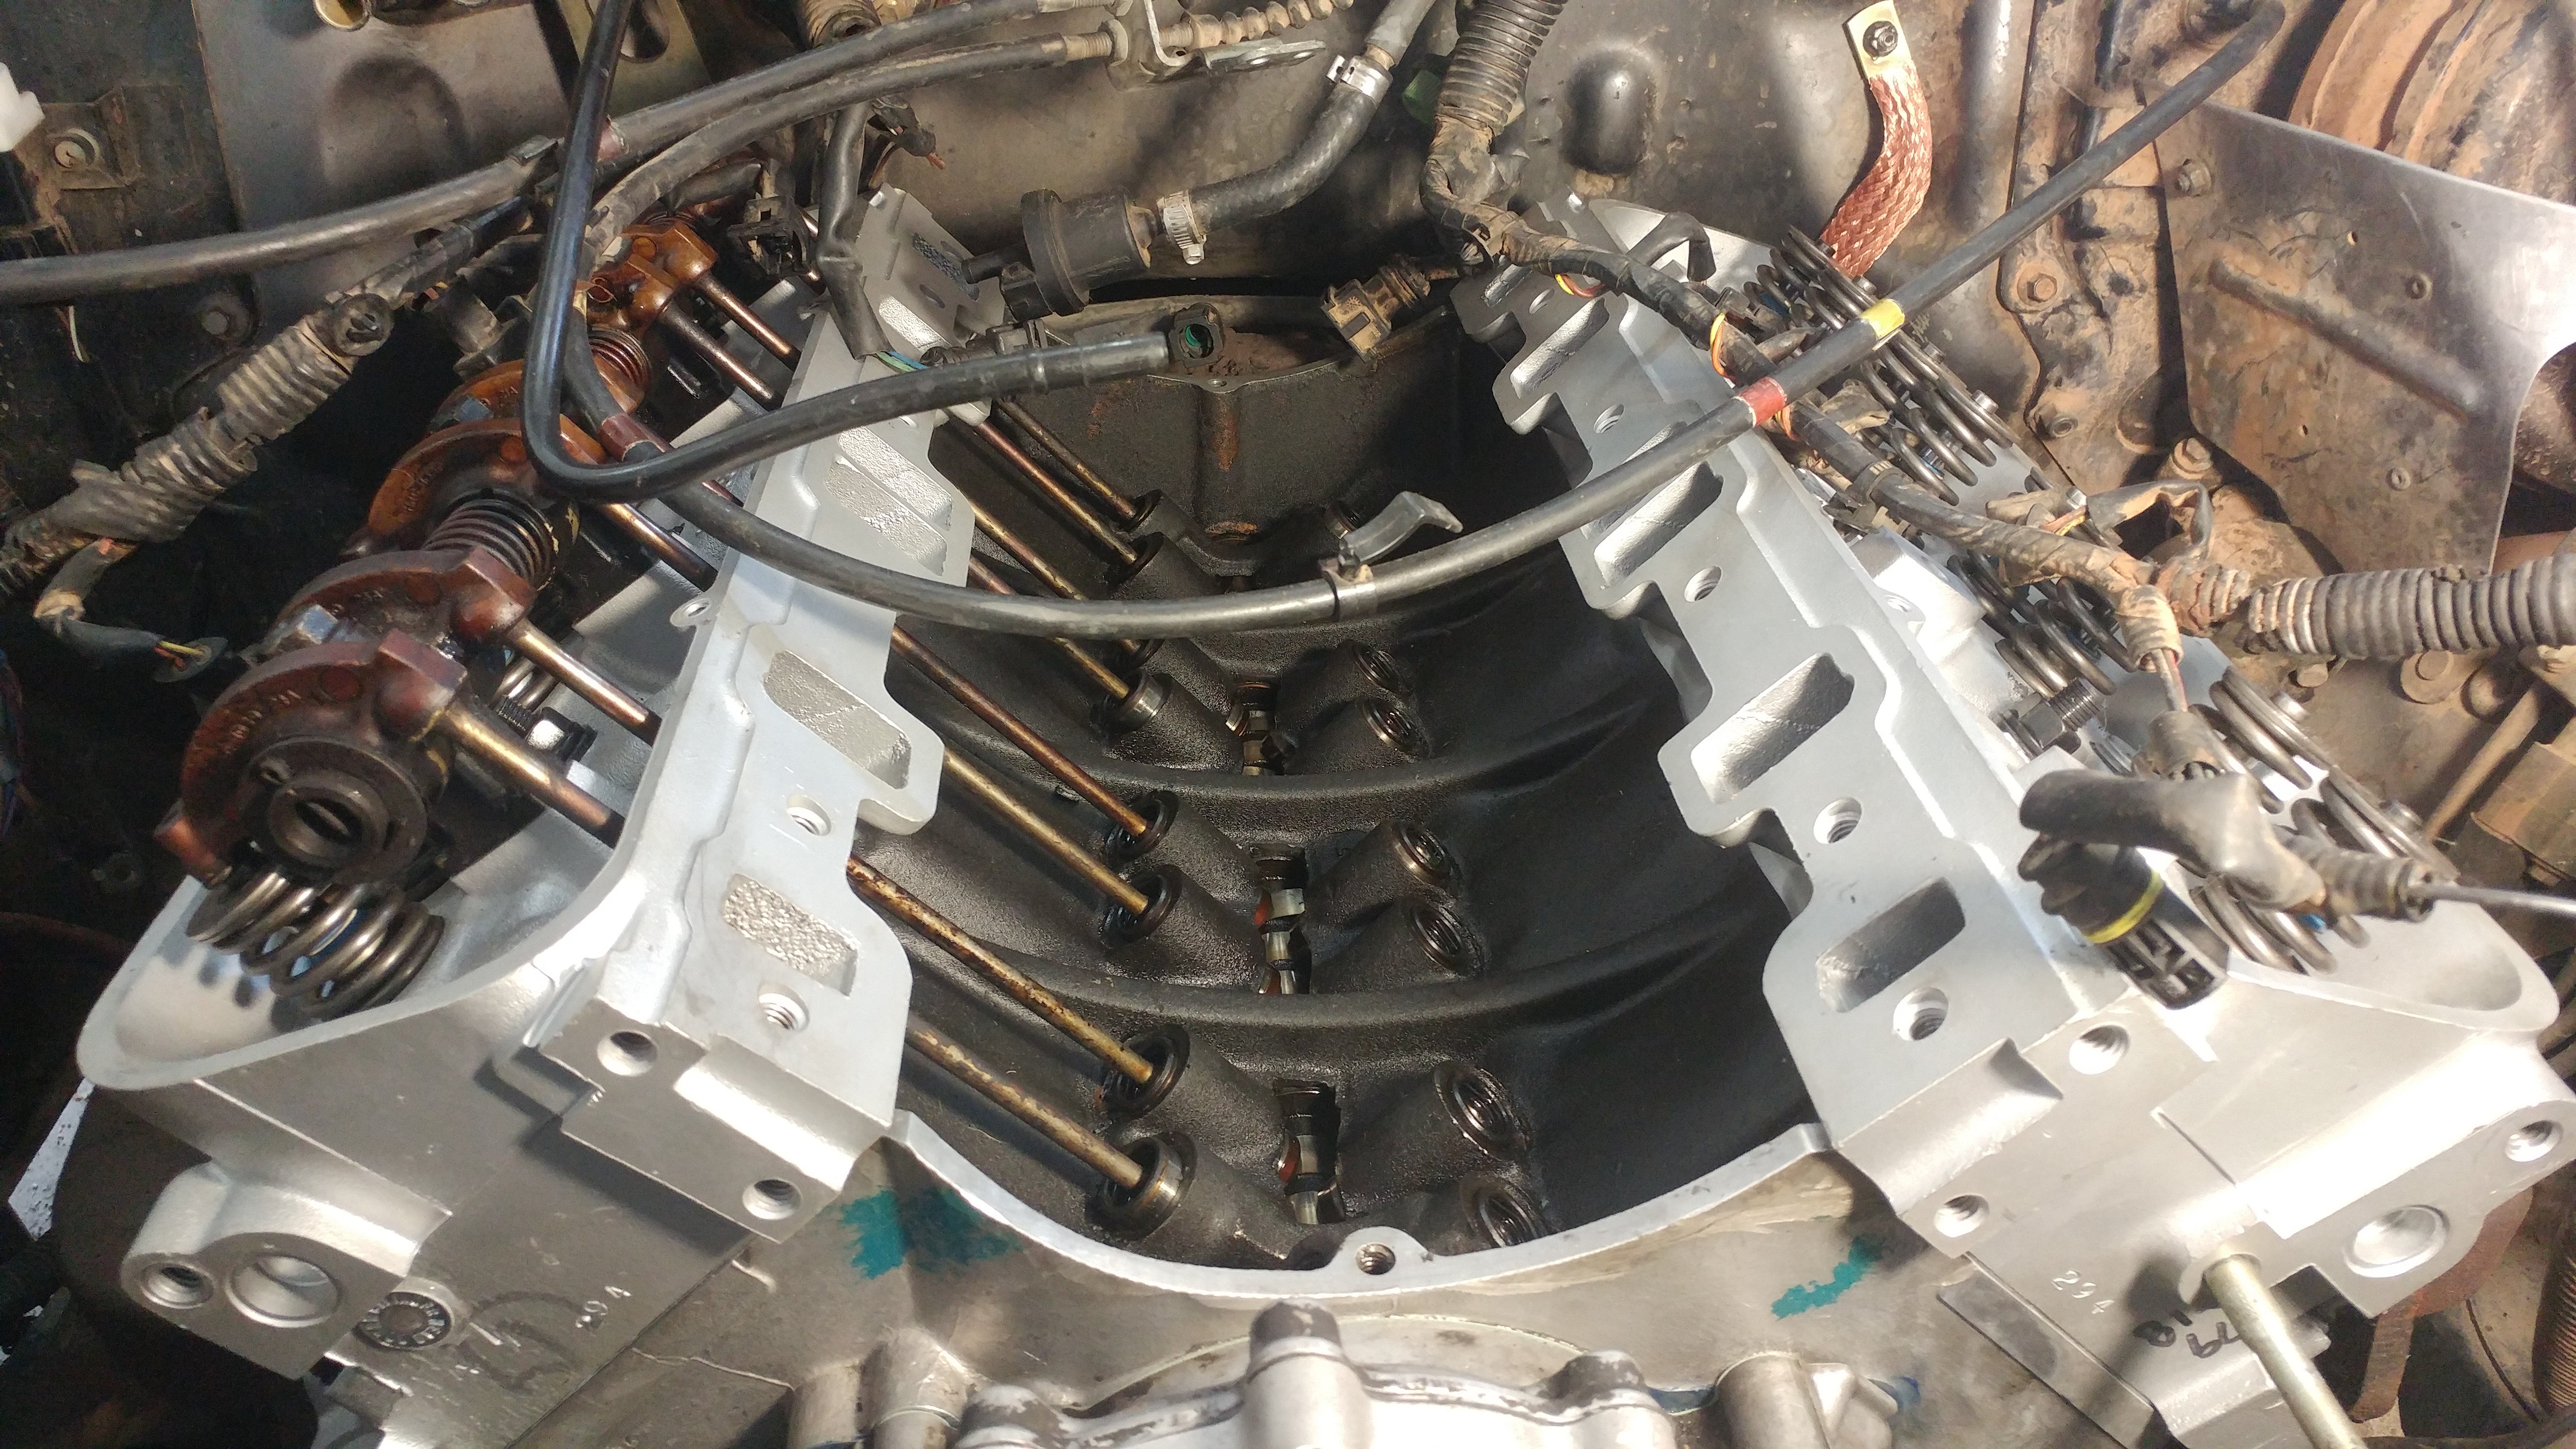
Saturday I started out by refitting the pushrods and rockers. This was surprisingly easy and straightforward, honestly. I got those all torqued up and it was suddenly time for the lower intake.
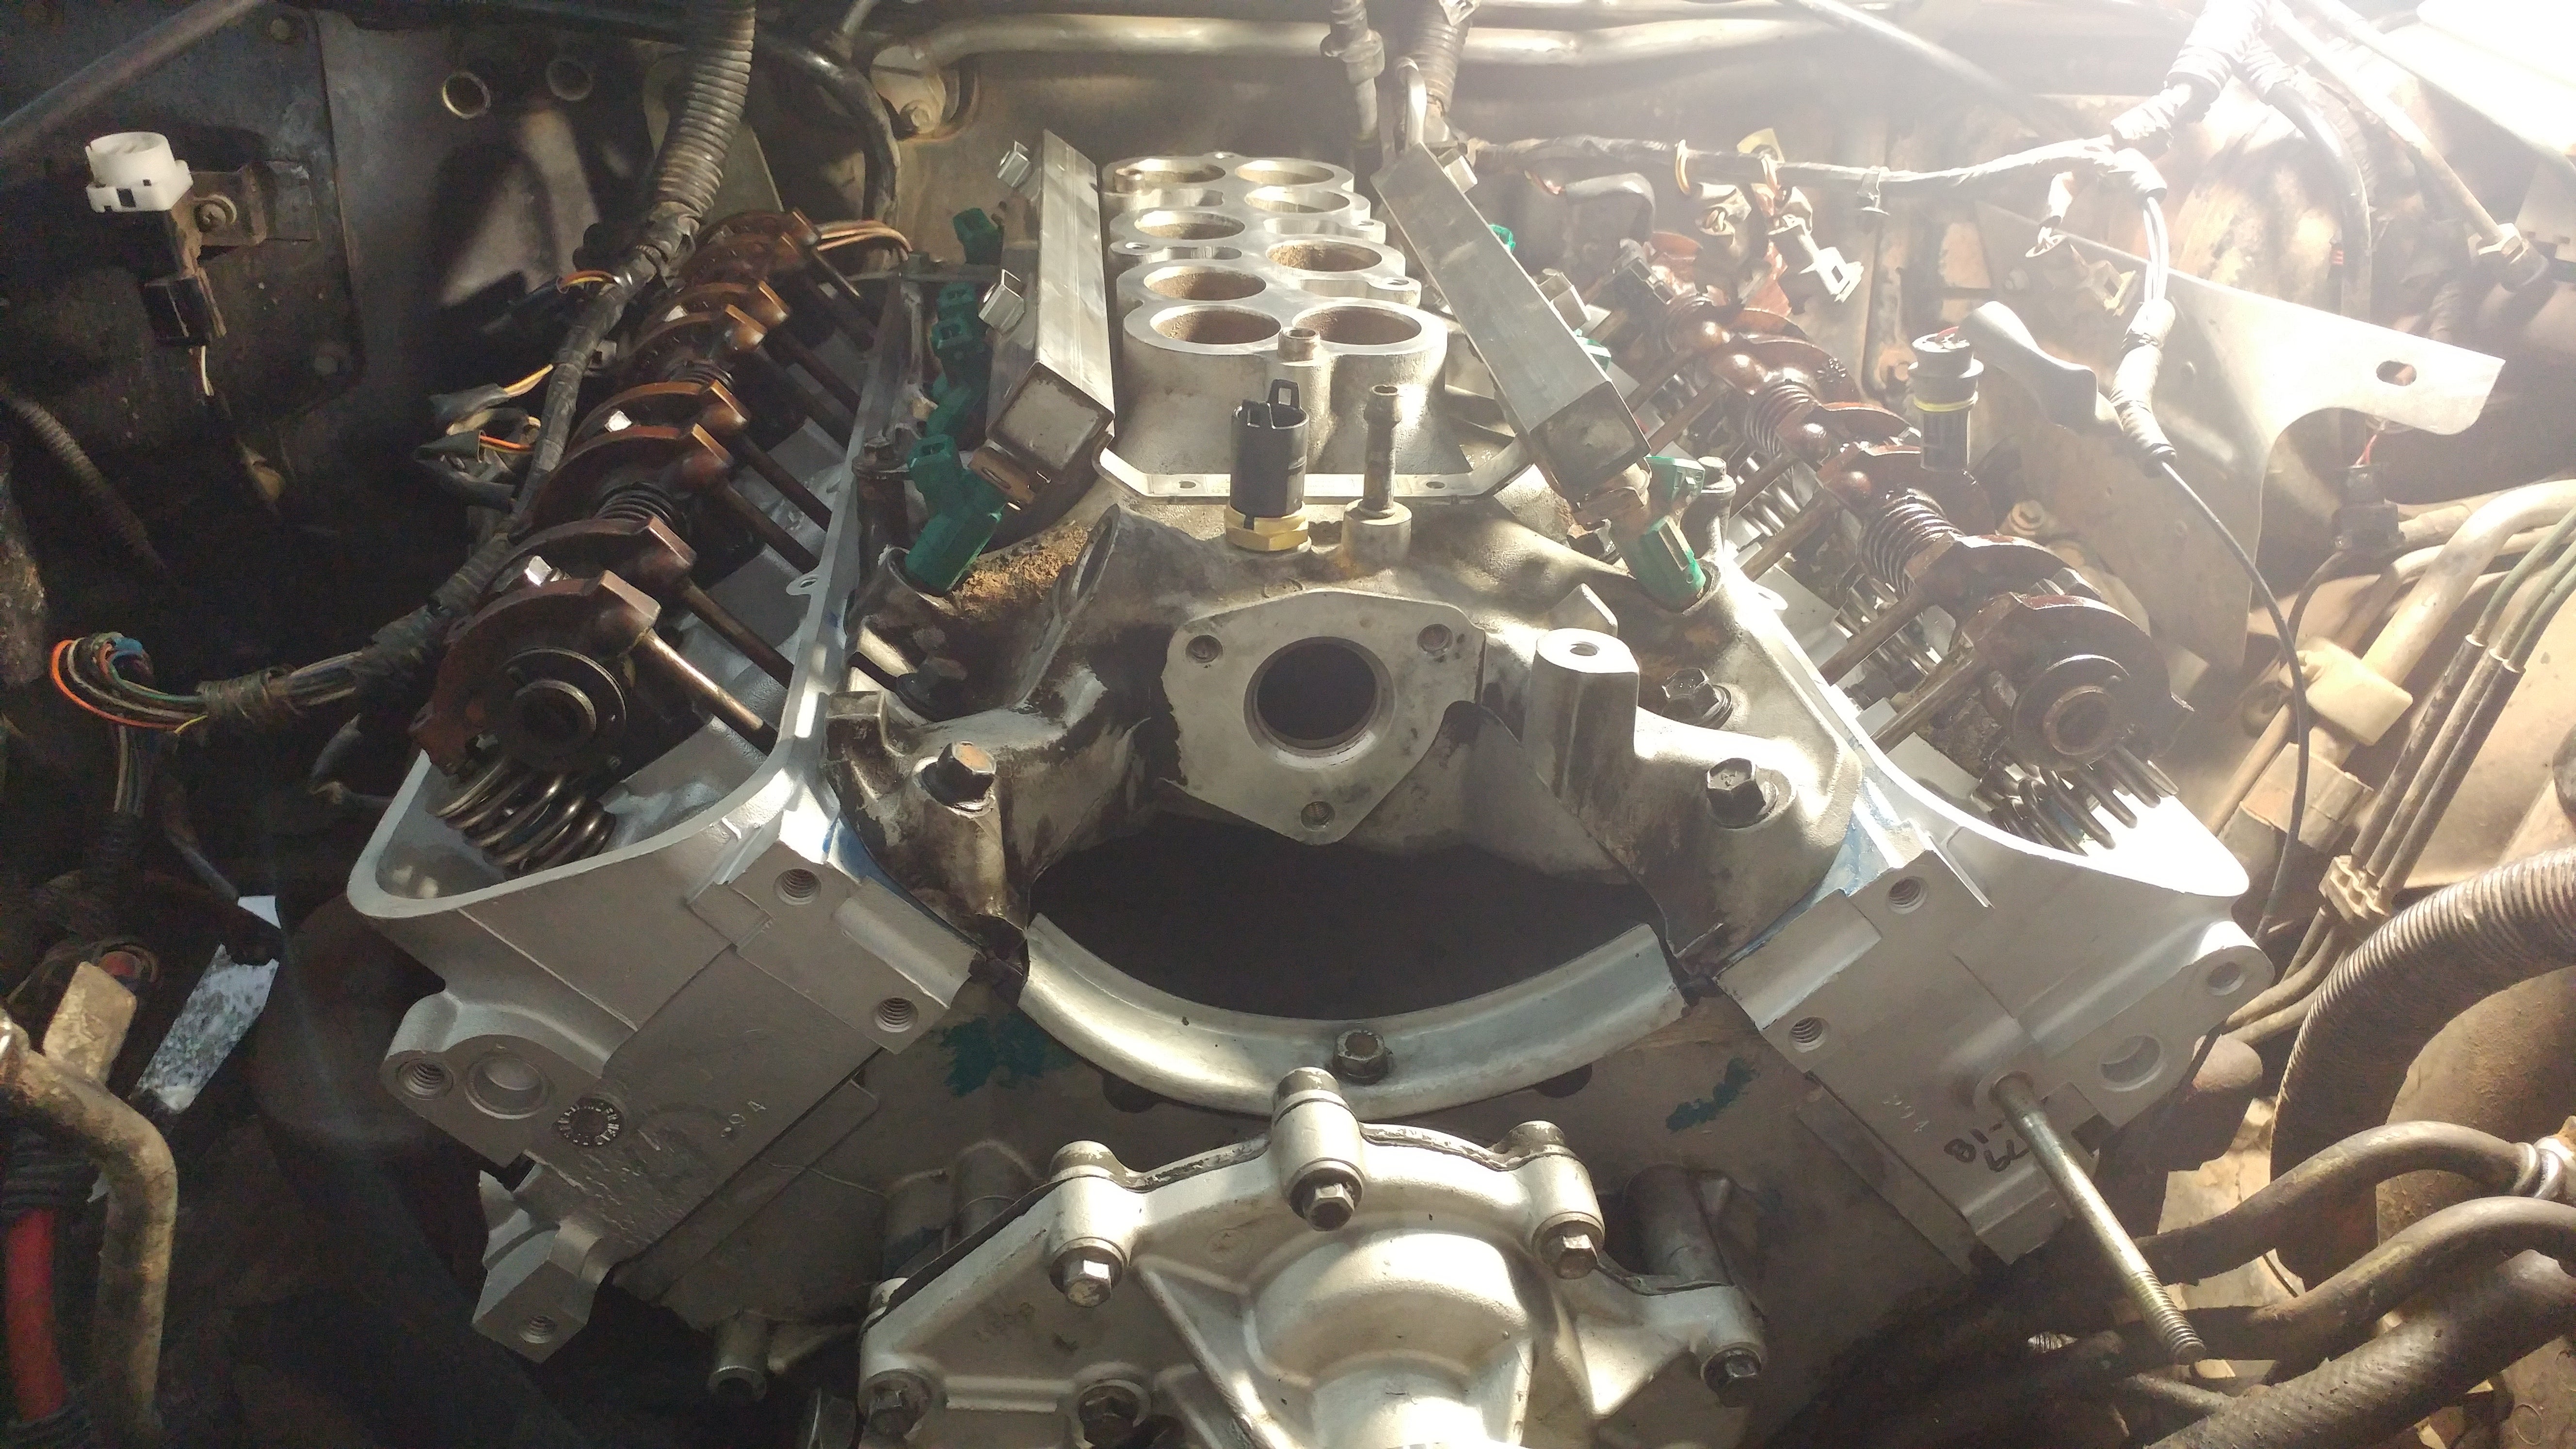
This one promised to be a bit of a pig... and it was. The lower intake is yet another gasket that does a whole lot of things all at once and failure in any one of those jobs could spell disaster. Also the gasket is huge, plastic clad metal, and three dimensional.
So... you know... typical Land Rover stuff.
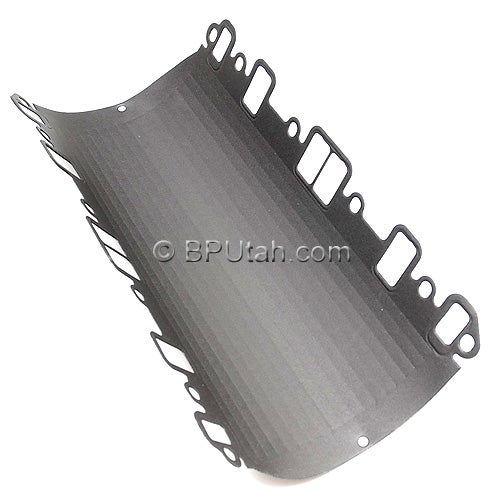
I dressed the sealing surface as per recommendations and also in hopes of making the seal a little easier to fit. I sort of cheaped out on this one and sadly the gasket wasn’t at quite the right angle. The weight of the intake would, of course, take care of that, but it made lining up the gasket a little more problematic.
That said, I eventually coerced the gasket into place and immediately ran into another problem: the bolt holes didn’t line up. And no, not as in I needed to shift the intake forwards or backwards a little. I mean the intake needed to go down a little.
You see, when heads are machined a little bit of material gets removed. On this engine, which has the lower intake sitting inside the “V” of the heads, this can cause fit problems after a head has been machined a few times.
I immediately went into panic/ worst case scenario mode. Luckily, I still had my old heads... so worst comes to worst I could get those checked? Or demand the company overnight me replacements? I only have a little over a week before we have to leave for the trip...
Putting worries aside, I pressed on and eventually got two bolts started, one on each side. Against my better judgement, I put some torque on those and magically the adjacent bolts also started to line up. Eventually I managed to get all the bolts in this way, and then proceeded to go through the standard four step tightening process*. Although it felt like I had put an inappropriate amount of torque on each bolt, I was still below the first torque setting for the tightening sequence, so... winning?
(* I say “four step” because a lot of these you progressively increase torque over three steps, but a lot of people recommend re-checking after 15-20 min, hence “four step”)
I was then torn away by friends that had shown up for dinner. Also it was 9PM at this point so... yeah.
After dinner we sat around the fire. I went into the garage to grab... something... and emerged an hour later having dressed and connected most of the wiring.
Oops.
Who needs a social life anyway...
Sunday morning, the rocker covers slid on with minimal fuss. Well... some fuss. It was easy to fit and begin tightening, but as I read the torque spec, things got weird.
Initial tightening: 2.5 ft*lbs; Final: 6 ft*lbs;
My torque wrenches only go down to 10.
I consulted the Atlantic British videos to see how they got around this. Turns out they did it the same way they complete most of the actually hard stuff: by doing a jump cut and saying that they did it.
>_<
I winged it and hopefully it will be fine.
Downside is there is no way to tighten these with the upper intake on, so if they leak I’m looking at another tear down.
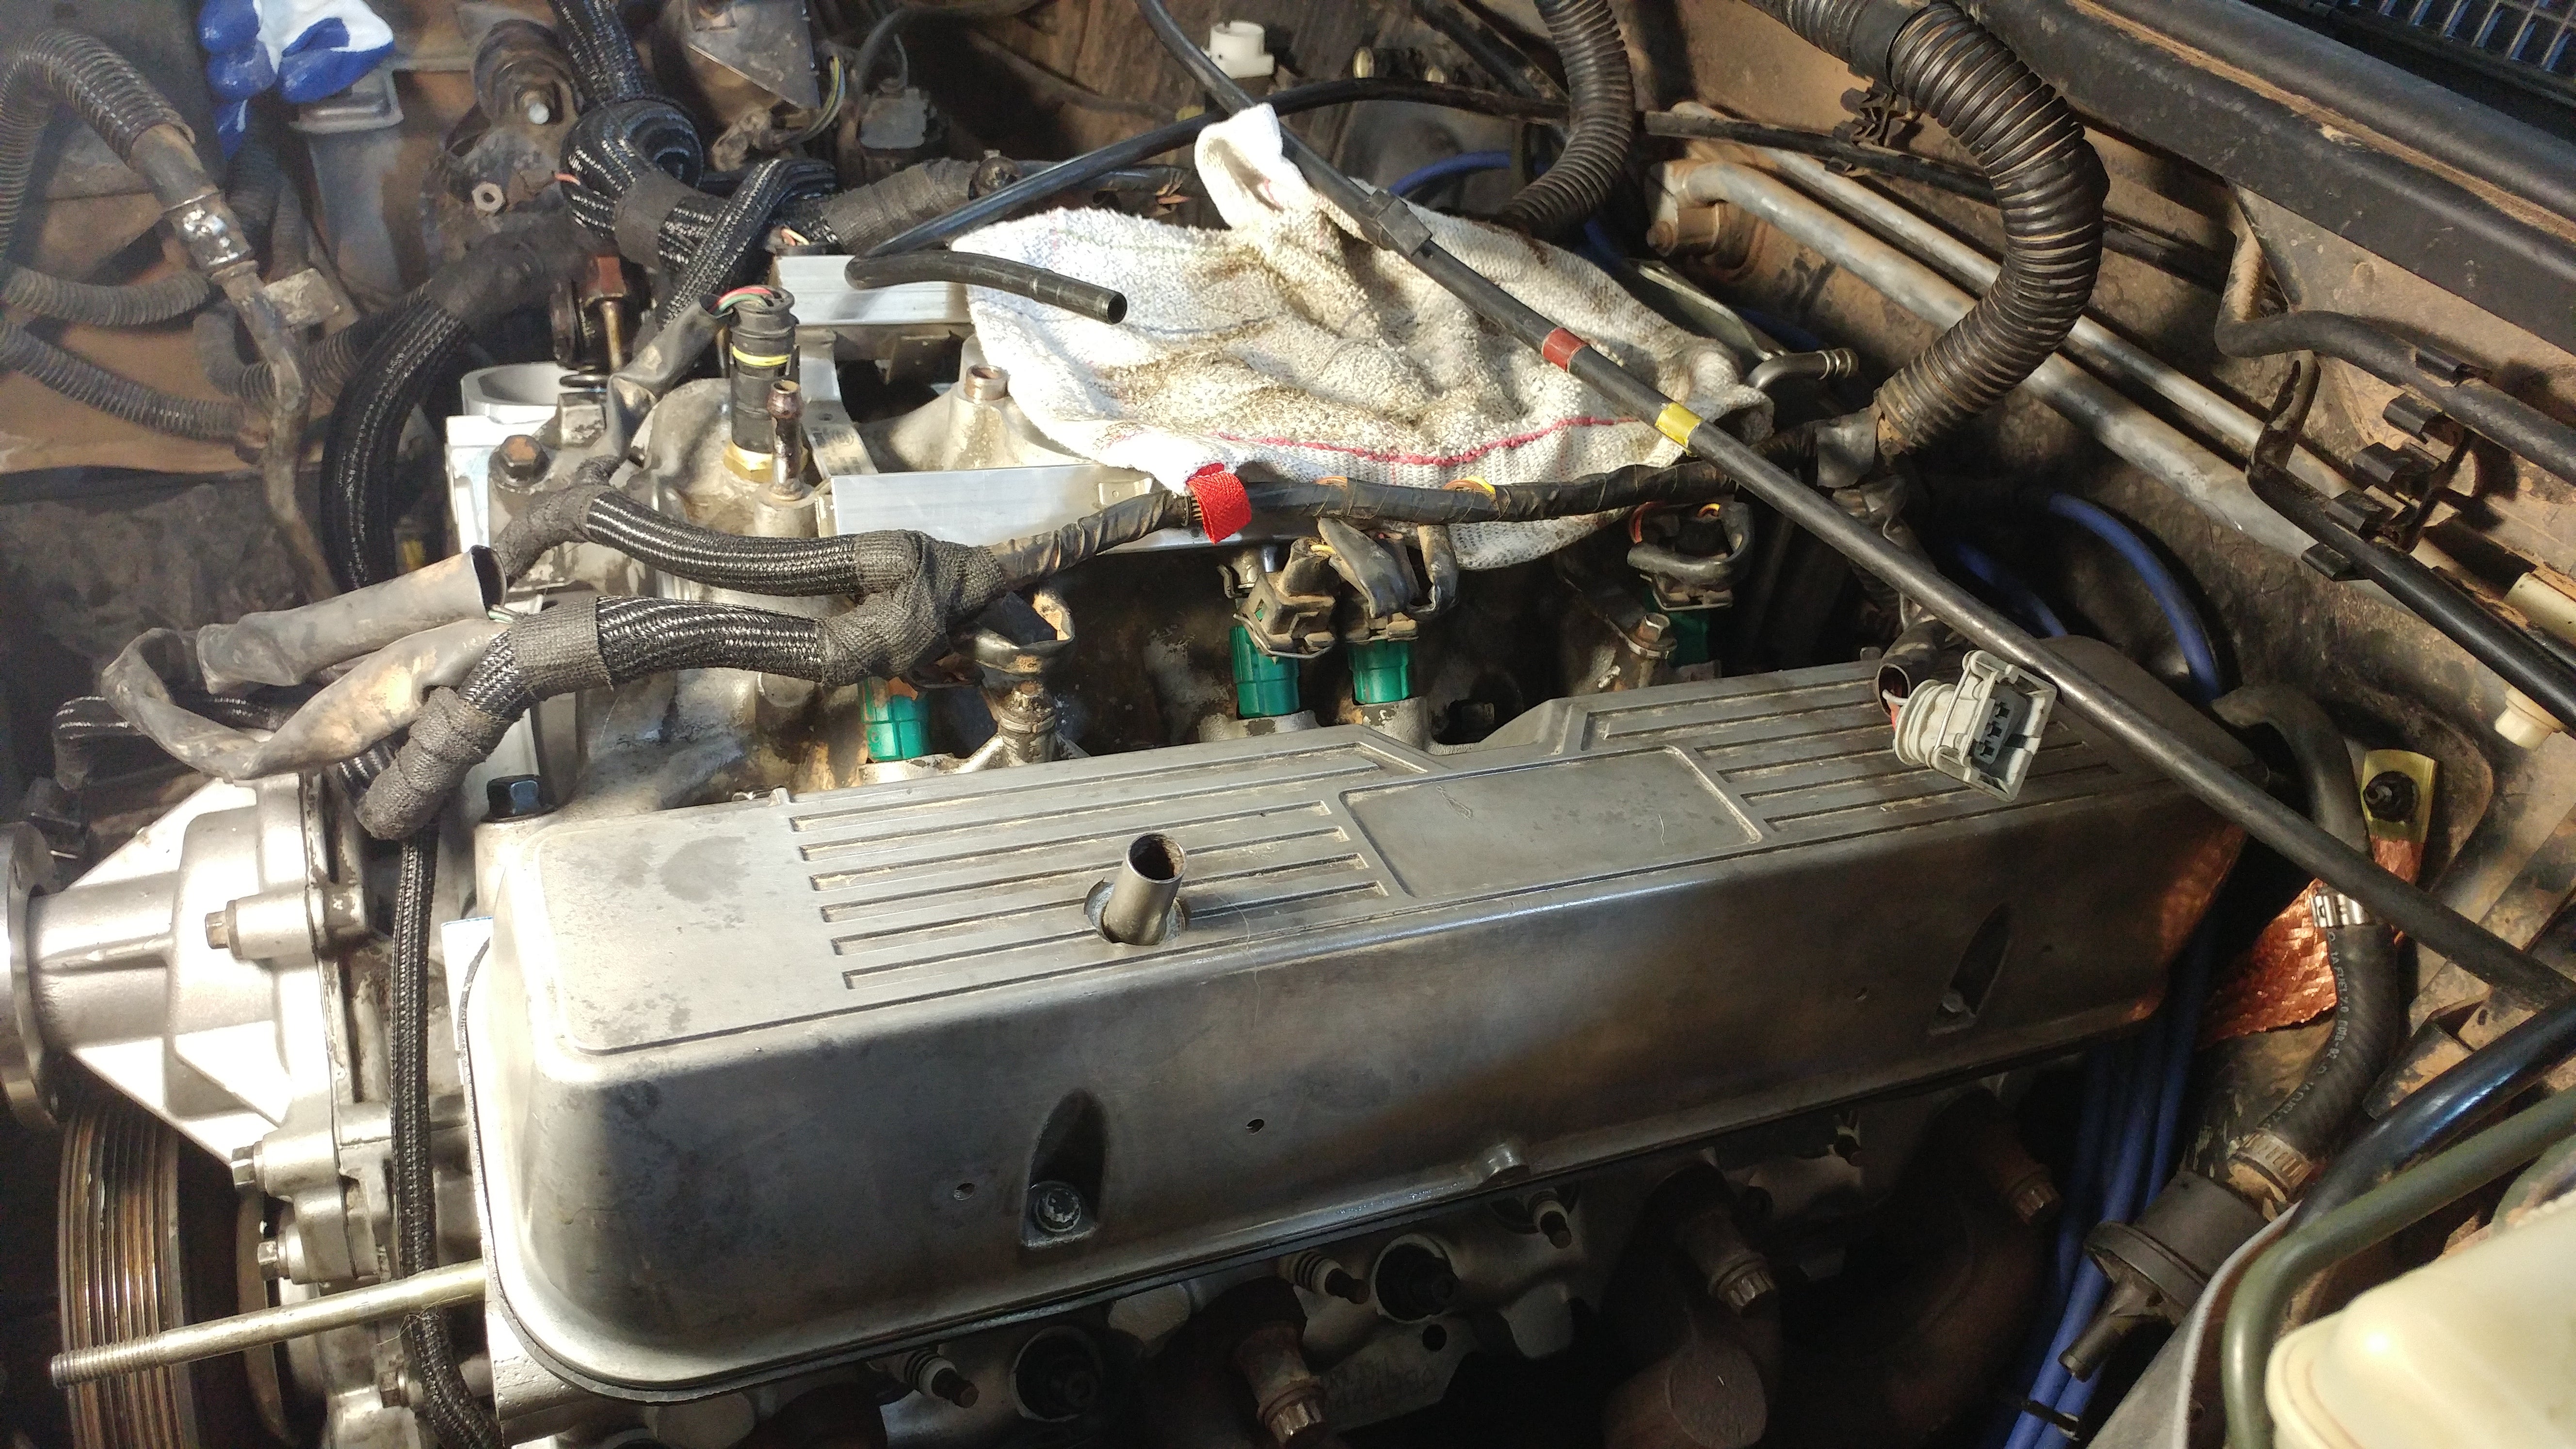
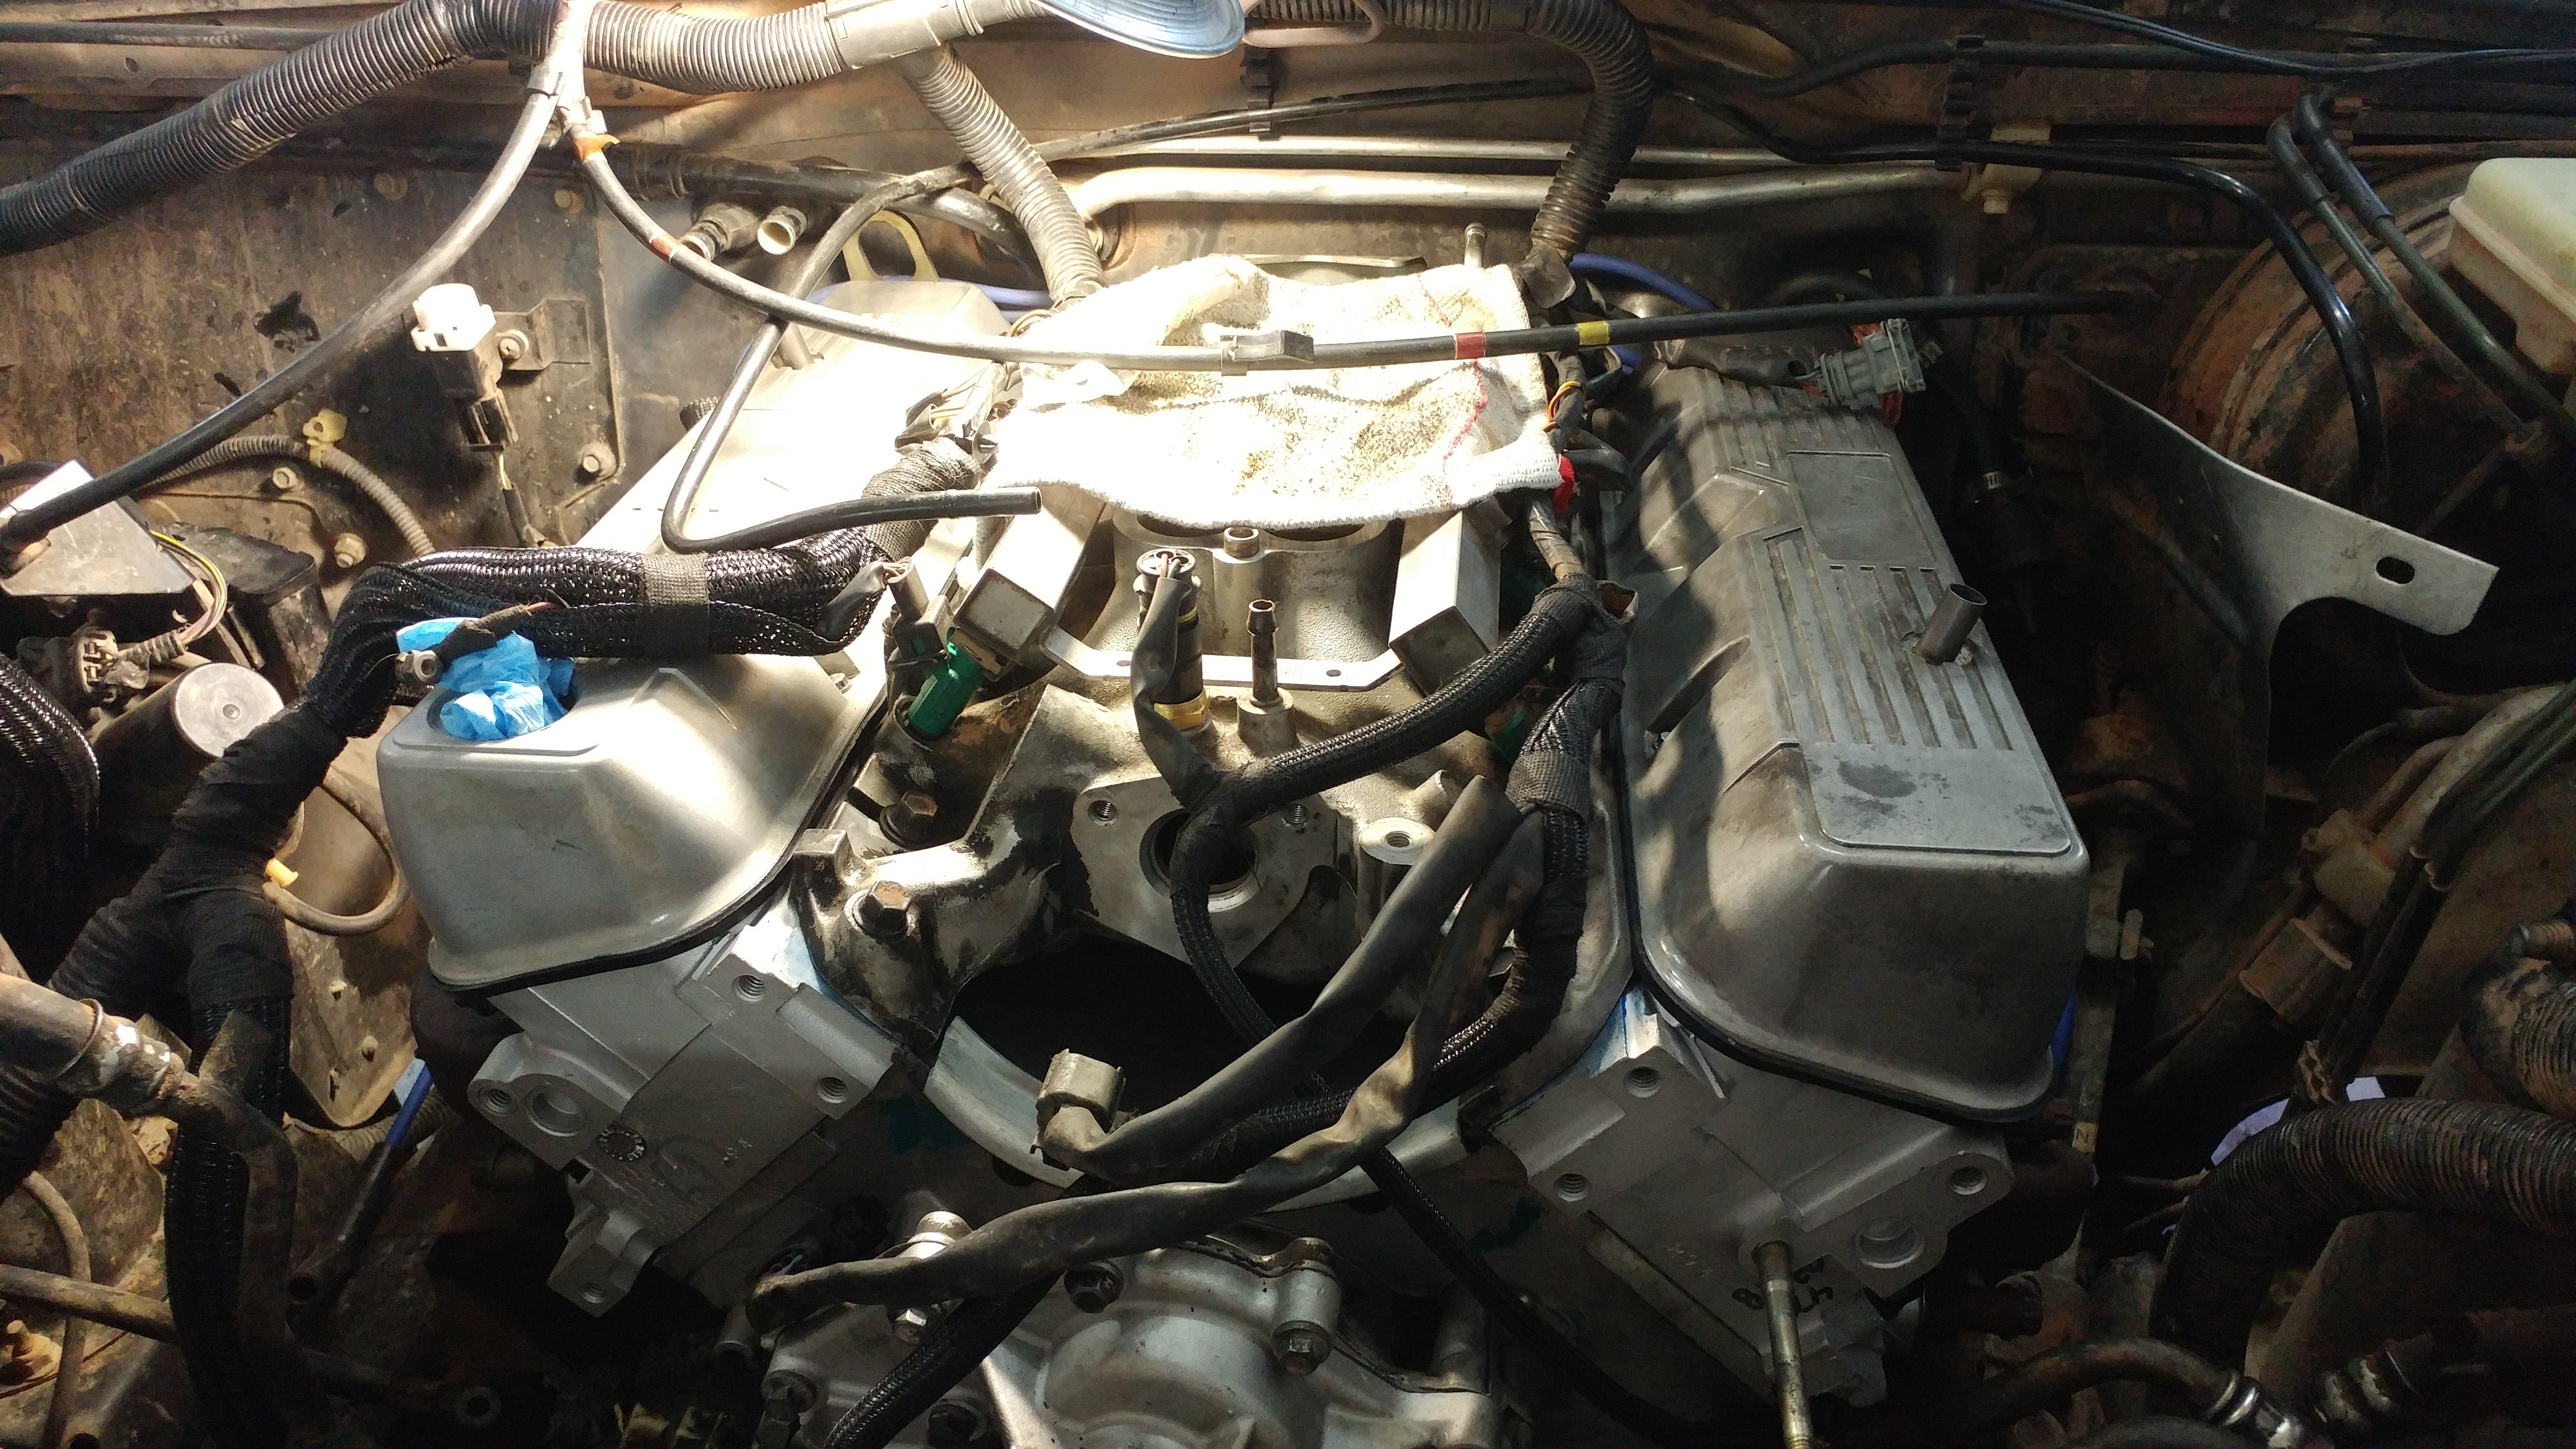
Next up would be the upper intake, but with the front of the engine stripped down, I figured it was time to start rebuilding the that while I still had access.
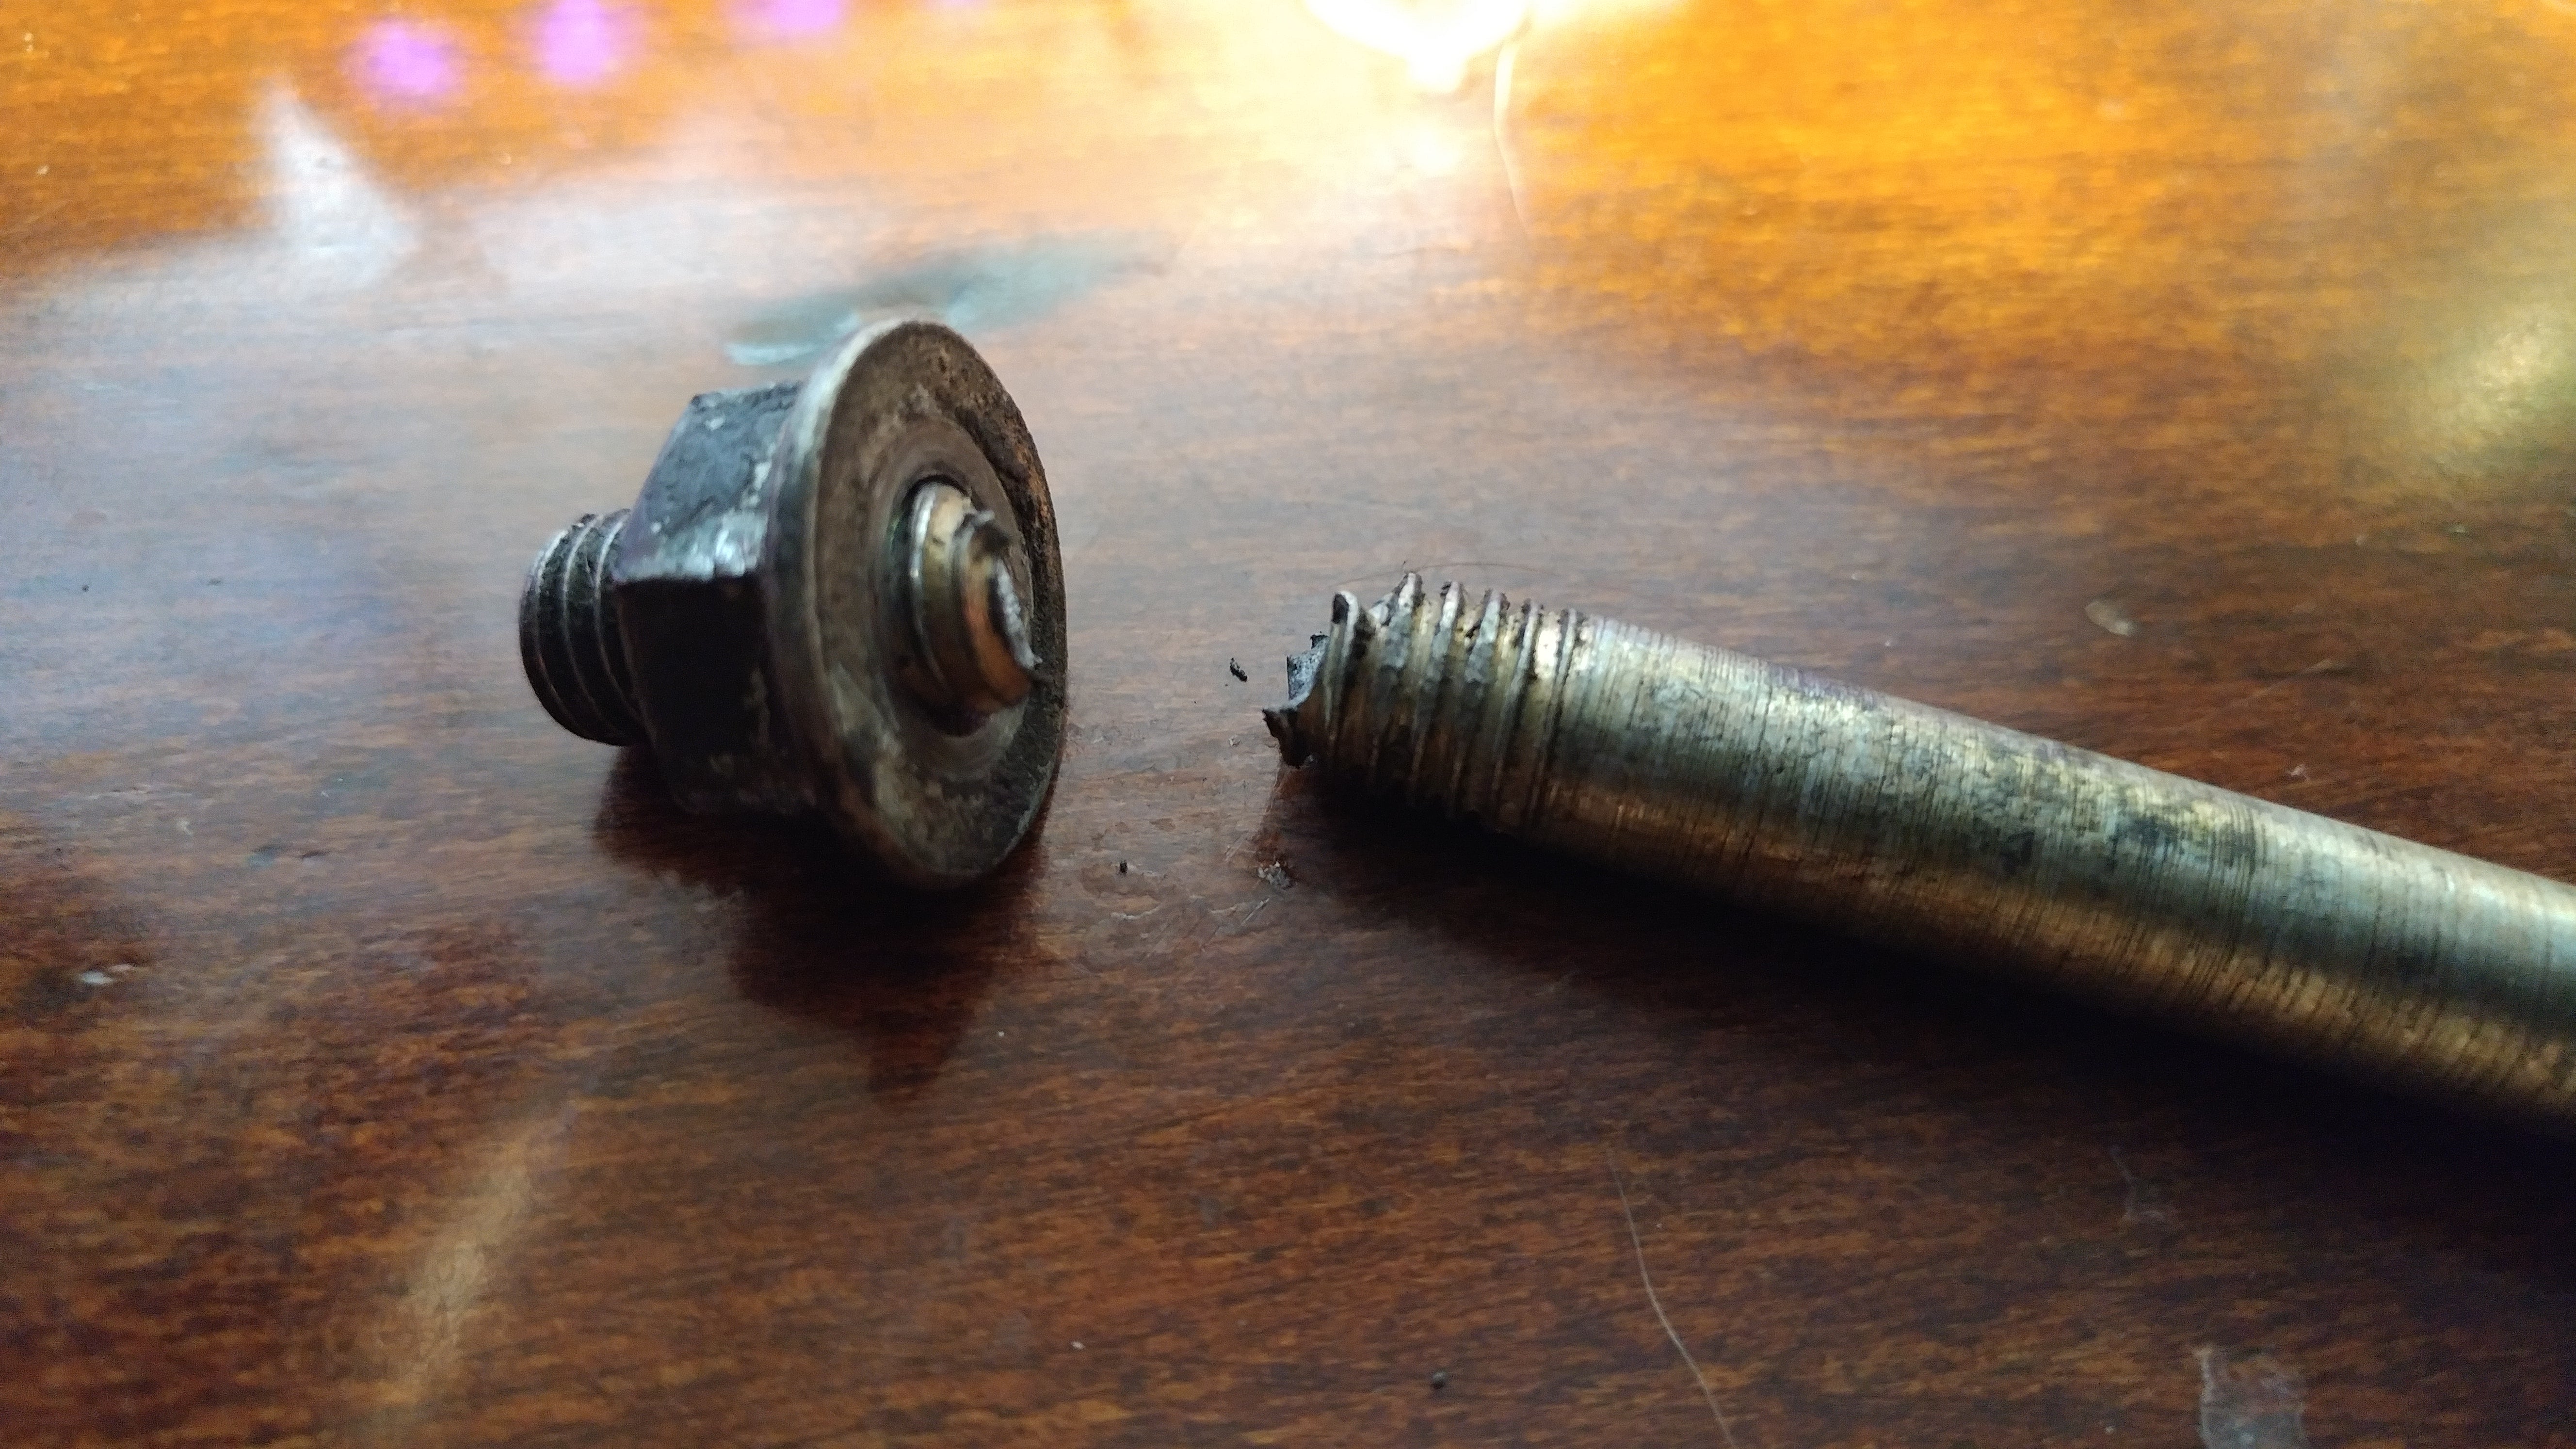
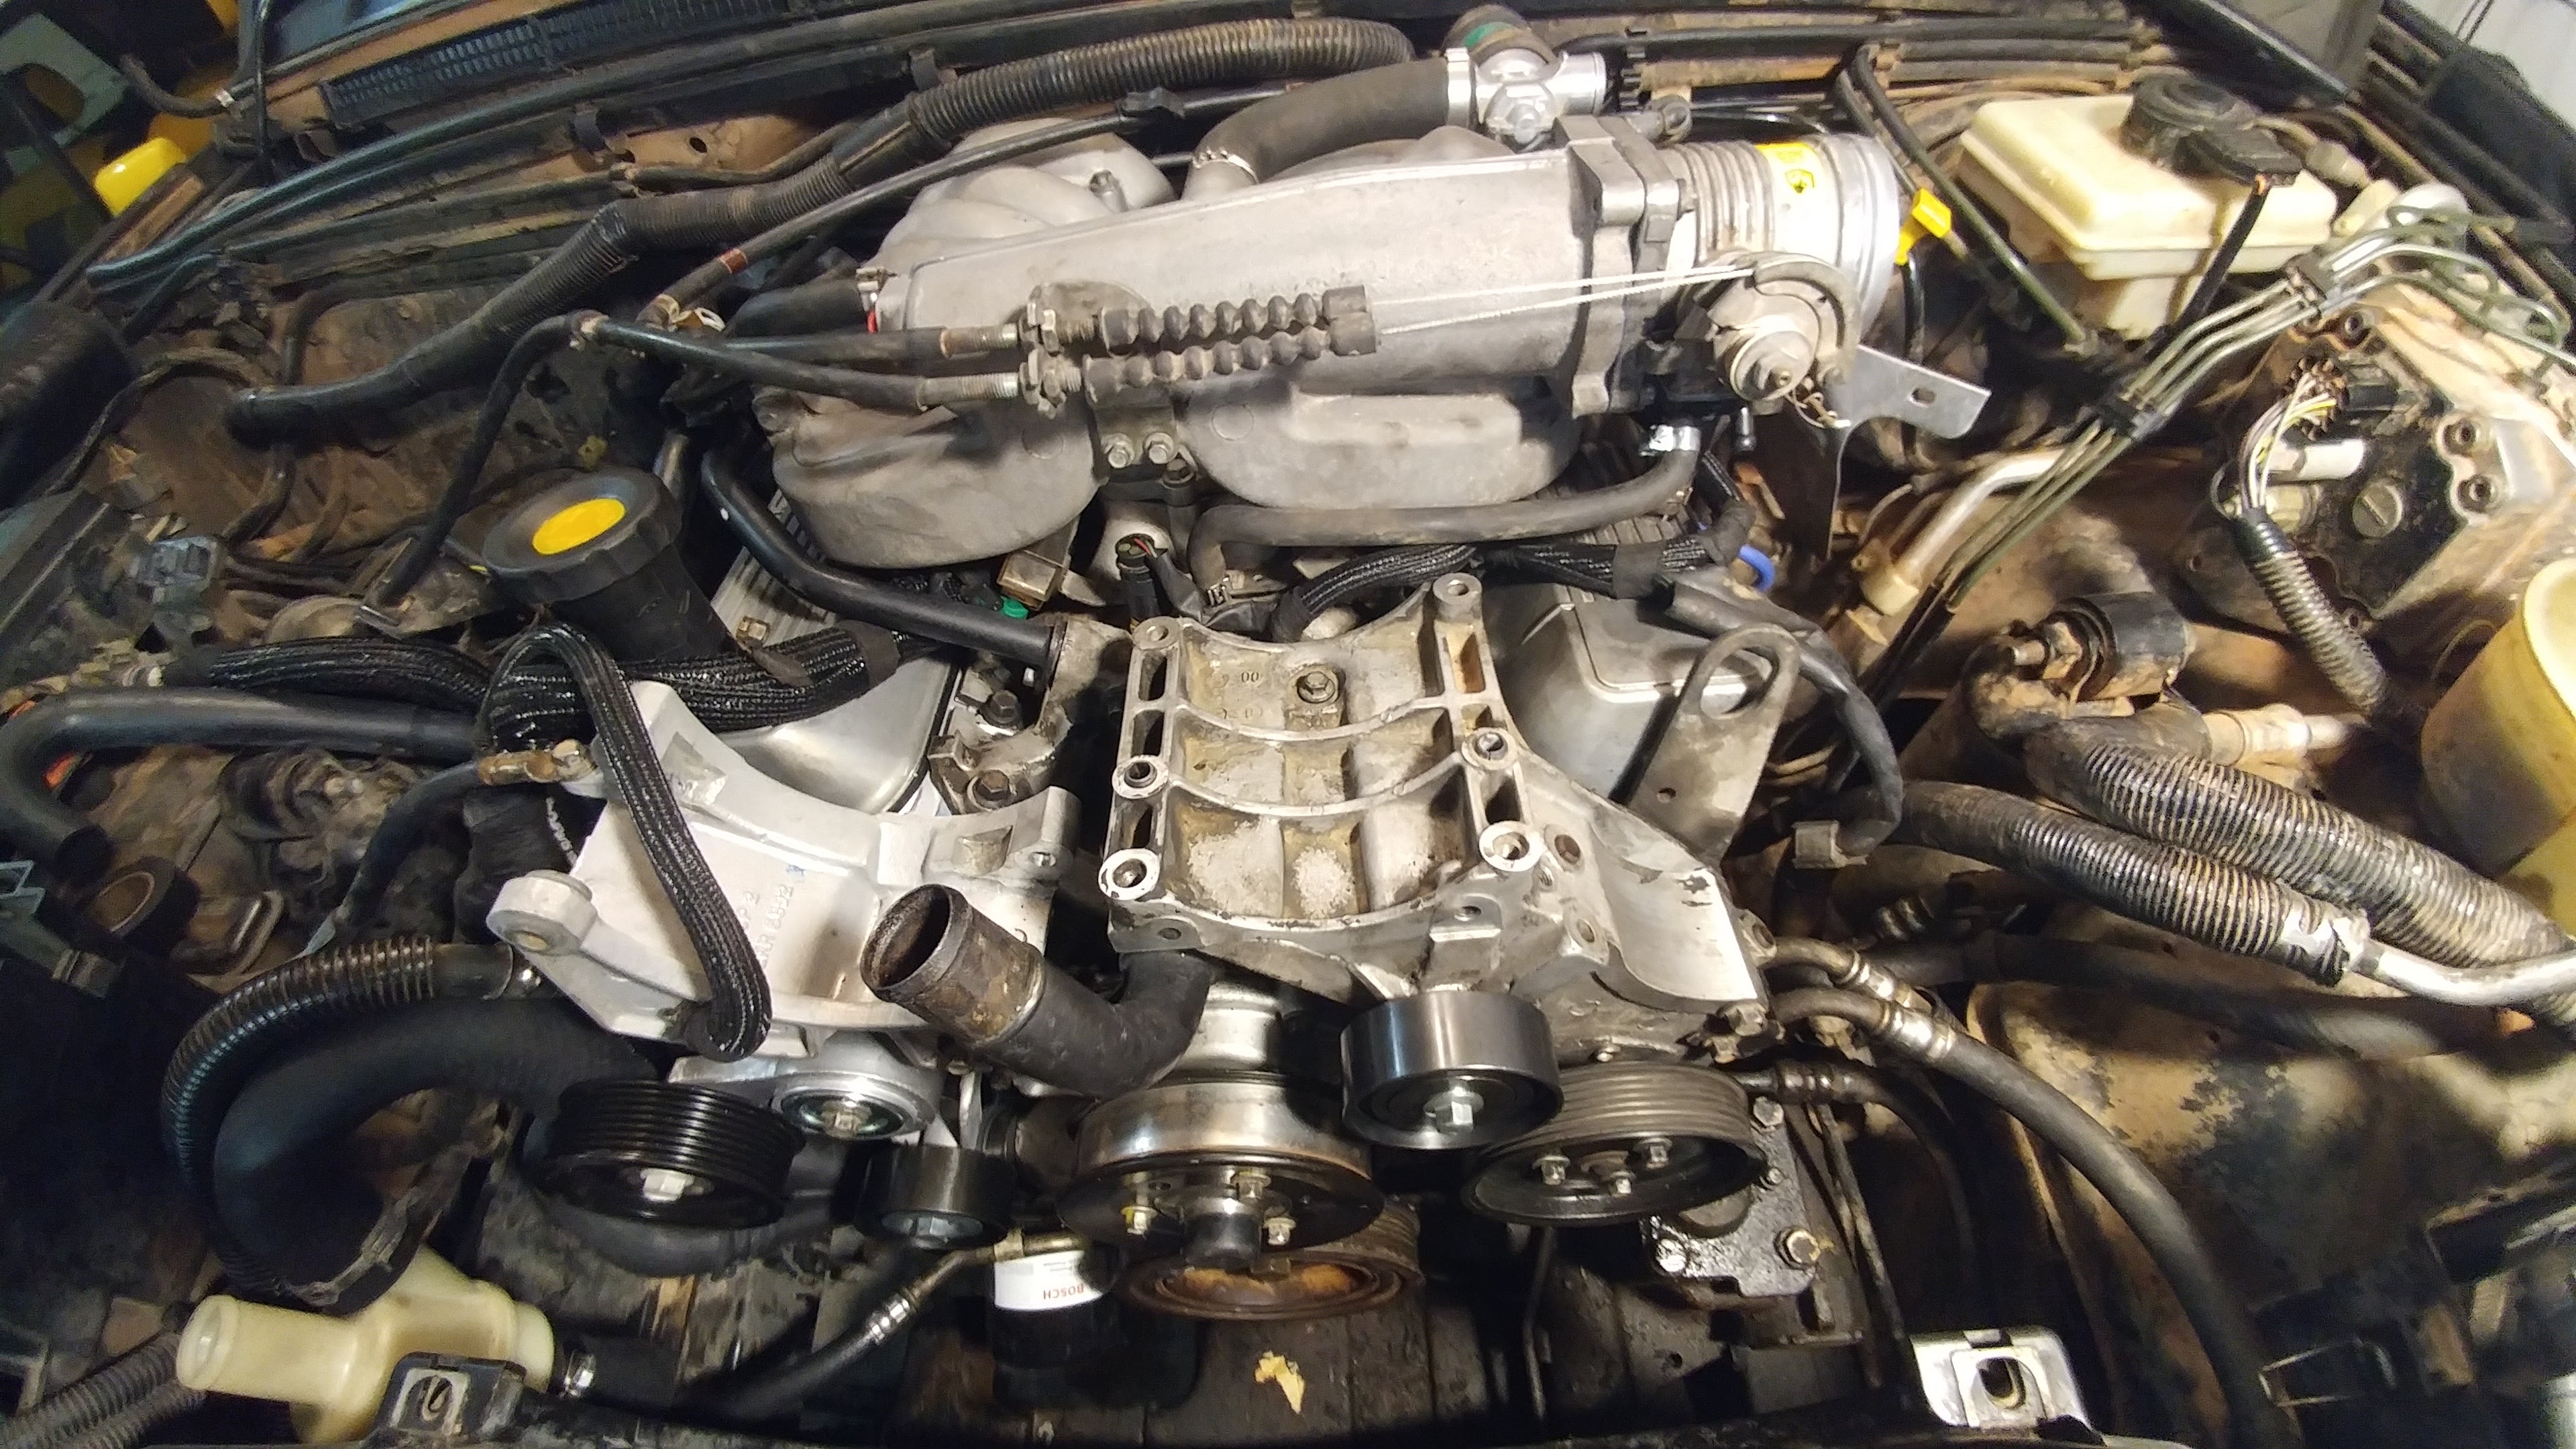
That went smoothly until I got to the power steering bracket. It is held on by five (or three?) bolts and a single nut. The bolts have a torque setting of 38 ft*lbs, so I got to work tigh- :snap:
Oh shit.
Yeah... that nut? Torque spec was 7 ft*lbs! Oops. The stud snapped pretty readily.
I consulted the D2 facebook group and was reminded why I hate the internet: my post got two replies almost instantly. One guy suggesting I drill and tap the block to get the stud out (I posted the same picture as above, so clearly the stud was out) and another (the group admin!) suggesting I download the manual so I’d know the torque specs (I literally posted a screencap of the manual). I just... can’t...
I’m getting kind of angry just thinking about it.
Ultimately, I decided to continue without it.
The front of the engine went together pretty easily, as did the lower half of the cooling system. The new idler/ jockey pulleys looked and felt awesome. It wasn’t until I got to the heater hoses I ran into my next problem.
Where are the heater hoses?
No serious I like... just had them!
Maybe they’re in the house?
Another car’s parts box?
Ok I’ll check the workshop again?
Maybe they’re in the car?
But seriously I would have sworn they were in the garage!
Ugh umm I’ll check the house again...
Or maybe the workshop? I mean... they should be with the other coolant hoses...
Maybe I put them in the engine bay?
[HOURS PASS]
Screw it.
I just drove to AutoZone, bought generic coolant hose, and made it work.
Sufficient time wasted, I finished getting everything but the alternator and AC compressor back on. Then it was time for the upper intake.
This was pretty straightforward execpt for the bastard coil bracket. You see, someone at Land Rover decided the coils should (A) mount behind the intakes and (B) be bolted to both the lower and upper intake.
This means that in order to fit, you need to have the alignment between the coil bracket and the upper intake perfect, because you can’t access the lower bracket screws while the upper is on. Also, the upper intake needs to be under the top of the coil bracket. It is hard to describe, but there is a special place in hell reserved for the team that decided this was good design.
I took a hint from the AB videos and just left the lower bracket bolts a little loose.
The upper intake slid on, the coils were secured, and I began attaching ancillaries. Breathers, throttle cables, IAC, stuff like that. I also noticed my throttle cables were a little loose, so I went ahead and adjusted those.
Job done I... ran out of steam. At this point it was 10PM on a Sunday and I’d been working for the last 12 hours, more or less straight. Also I have to work in the morning, and the dogs are forgetting what I look like, and holy shit that is a lot of dishes.
All we lack...
I am thinking tonight is the night. Either it goes well and I can post in victory tomorrow or, more likely, I fucked something up and best case spend the next couple of days troubleshooting.
Or I forget to put oil back in it and burn the whole thing to the ground.

Dog B being “trapped” under some gym shorts, for your time.
 AMGtech - now with more recalls!
> Akio Ohtori - RIP Oppo
AMGtech - now with more recalls!
> Akio Ohtori - RIP Oppo
03/19/2018 at 15:39 |
|
If it makes you feel any better you’re not the first one to break that stud. Never left one out though, but I doubt it will cause you any issues. Totally forgot how much of a bastard that coil is.
|
Akio Ohtori - RIP Oppo
> AMGtech - now with more recalls!
03/19/2018 at 15:42 |
|
As far as I can tell it is there to help align the aux housing bracket? I dunno. I’m nervous that I should have at least left it in, but... here we are.
|
AMGtech - now with more recalls!
> Akio Ohtori - RIP Oppo
03/19/2018 at 15:45 |
|
Yeah that’s exactly what it’s for. But there isn’t a ton of play with the bolts in place so you might be fine. If you’re worried about it I’m sure you can find one at a Rover shop or junkyard.
|
Akio Ohtori - RIP Oppo
> AMGtech - now with more recalls!
03/19/2018 at 15:49 |
|
Only place I found one was Rovers North, but it has a 6-8 day lead time, which is unacceptable for the current project. I’ll go ahead and get one on order and keep it in the parts box for the next time I have that bracket off. I assume the PS pump doesn’t have that many days left in it anyway...